Installation Techniques Guide for Professional AC Installation
What Is an HVAC Installation Techniques Guide?
An installation techniques guide is a homeowner-facing roadmap for how professional AC installation should be planned, staged, installed, tested, and handed off. It helps you understand safe, code-conscious, manufacturer-aligned practices, but it is not a DIY manual for refrigerant, electrical, structural, or permit-regulated HVAC work.
For BlueNest homeowners, the goal is clarity. A good AC installation guide explains what should happen before, during, and after the job so you can ask better questions, recognize careful workmanship, and feel confident when comparing installers.
This guide focuses on professional AC installation practices, not every related HVAC topic. It does not cover pricing in depth, full load calculations, brand comparisons, efficiency rating comparisons, maintenance schedules, repair troubleshooting, water leaks, mold, drain line clogs, or duct sweating. Those topics matter, but they are separate from the installation process itself.
Why does the process matter? The U.S. Department of Energy notes that improper HVAC installation can reduce heating and cooling performance and efficiency. In practical homeowner terms, even good equipment can disappoint if it is placed poorly, connected carelessly, charged incorrectly, or handed off without proper testing.
Professional AC Installation vs. DIY Air Conditioner Setup
Homeowners can prepare the work area, confirm access, and ask informed questions, but central air installation tasks involving refrigerant, electrical connections, structural mounting, code compliance, and commissioning should be completed by licensed HVAC professionals.
A central AC system is not a plug-in appliance. It involves refrigerant handling, electrical coordination, airflow verification, condensate planning, duct or indoor unit connections, control setup, and local inspection requirements. In Florida and South Florida homes, installers may also need to consider humidity control, outdoor exposure, corrosion risk near coastal air, and wind-conscious placement.
EPA Section 608 requirements are one reason refrigerant work is not a homeowner DIY task. Refrigerant must be handled by properly certified technicians using appropriate recovery, evacuation, charging, and documentation practices.
Safe homeowner tasks vs. not-safe installation tasks
- Safe for homeowners: clear access to the attic, closet, garage, side yard, roof access point, or condenser area.
- Safe for homeowners: secure pets and move fragile items away from work paths.
- Safe for homeowners: confirm thermostat preferences and ask where the control will be located.
- Safe for homeowners: ask whether permits or inspections are expected for the scope of work.
- Safe for homeowners: review equipment documents, warranty information, and startup notes with the installer.
- Not safe for DIY: refrigerant recovery, charging, evacuation, brazing, or line-set pressure testing.
- Not safe for DIY: high-voltage wiring, disconnect work, breaker coordination, or control wiring changes.
- Not safe for DIY: structural mounting, roof stands, hurricane-rated anchoring decisions, or code-regulated supports.
- Not safe for DIY: commissioning, airflow balancing, condensate safety setup, and final system verification.
Qualified HVAC professionals may use recognized design standards such as ACCA Manual J, Manual S, and Manual D before installation. Homeowners do not need to perform those calculations, but you can ask whether the installer considered load, equipment selection, and duct design before recommending the system.
Main Types of AC Installation Homeowners May Hear About
Contractors may use different terms depending on the equipment and scope. Understanding the language helps you follow the conversation without turning your decision into a brand, price, sizing, or efficiency comparison.
Central air installation
Central air installation usually includes an indoor air handler or evaporator coil, an outdoor condenser, refrigerant line set, duct connections, thermostat or control wiring, condensate routing, and final commissioning. The installer must coordinate indoor airflow, outdoor clearance, electrical requirements, drain planning, and equipment-specific startup steps.
Split-system replacement installation
A split-system replacement may sound simple because equipment already exists, but it still requires careful staging. Professionals remove old components, prepare the installation area, place new indoor and outdoor equipment, connect or adapt duct transitions, route or evaluate refrigerant lines, evacuate and charge the system, run startup checks, and document the work.
Manufacturer installation manuals guide many of the details, including placement, clearance, wiring, line-set requirements, condensate instructions, and startup procedures. A quality installer should follow those instructions rather than relying on shortcuts.
Ductless or mini-split installation
Ductless installation uses one or more indoor heads connected to an outdoor unit. Homeowner-facing details include indoor head placement, outdoor unit location, line-set routing, wall penetration sealing, condensate handling, control setup, and commissioning. Placement matters because comfort, noise, drainage, service access, and appearance are all affected by where the components are installed.
Step-by-Step Central Air Installation Overview
This overview explains what professionals are doing and why it matters. It is not a technical DIY procedure, but it gives homeowners a useful process map for a well-managed installation day.
- Pre-install planning and walkthrough: The installer confirms access, work areas, equipment locations, thermostat or control needs, safety considerations, permit or inspection expectations, and documentation before work begins. This reduces surprises and helps protect the home.
- Site protection, staging, and removal: Crews protect floors and nearby surfaces, stage equipment and materials, coordinate power shutoff where needed, and remove old equipment if applicable. Good staging keeps the job organized and safer.
- Indoor equipment placement: Professionals set the indoor unit or coil in the approved location and prepare transitions to existing ducts or the air distribution system. Correct placement supports airflow, service access, and long-term reliability.
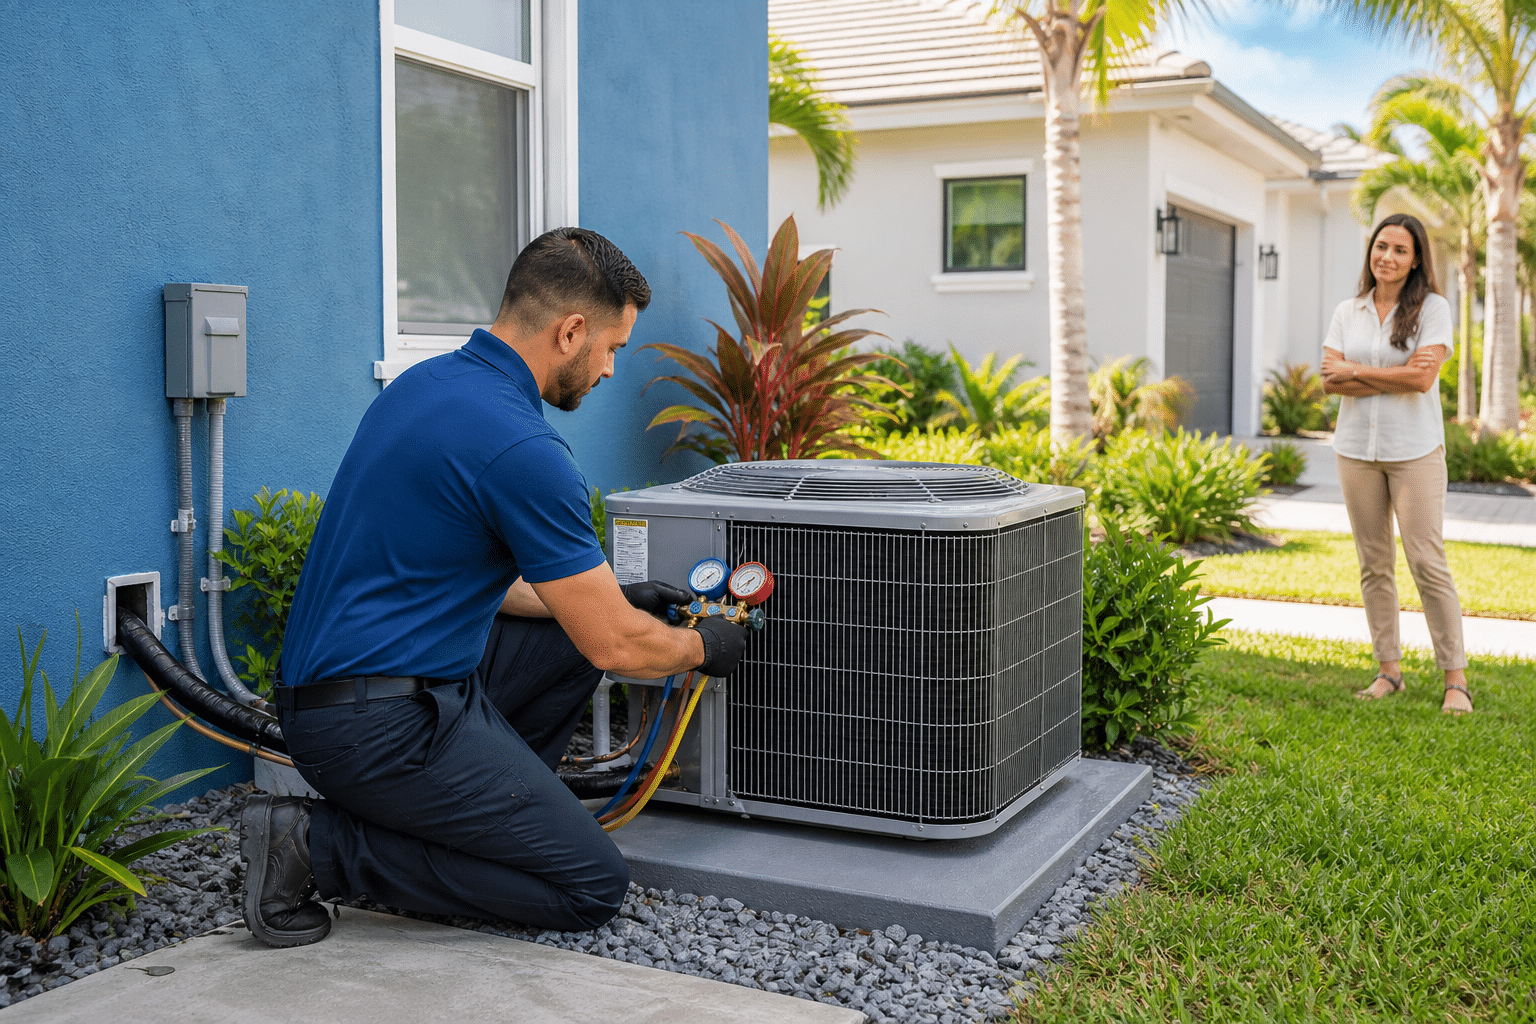
- Outdoor equipment placement: The condenser is placed on a stable pad, stand, or approved support with required clearance. In Florida, installers may also consider drainage, salt-air exposure near the coast, and wind or storm exposure where applicable.
- Line-set, duct, and penetration coordination: Technicians route and protect refrigerant lines, coordinate duct transitions, seal wall or building penetrations, and plan neat, serviceable connections. This helps avoid energy loss, moisture entry, and service problems later.
- Condensate planning: The installer reviews how moisture from cooling will be removed from the system. In humid climates, condensate routing and safety considerations are especially important, even though troubleshooting drain problems is a separate service topic.
- Electrical and control setup: Licensed or qualified professionals coordinate power connections, disconnects, controls, and thermostat setup according to local requirements and manufacturer instructions. This is a key difference between professional installation and appliance setup.
- System startup and commissioning: The system is started, tested, and verified. Commissioning may include airflow checks, temperature response, refrigerant-related verification by certified technicians, condensate review, thermostat operation, and startup documentation.
- Homeowner handoff: The installer explains basic operation, thermostat use, filter access, equipment clearances, warranty paperwork, and what normal operation should sound and feel like. A clear handoff is part of a complete installation.
The Department of Energy’s warning about improper installation reducing performance and efficiency is why each step matters. A rushed installation can create comfort complaints that have little to do with the equipment brand itself.
HVAC Installation Techniques That Signal Quality Work
Homeowners do not need to know how to install an AC system to recognize quality. Strong HVAC installation techniques usually show up in placement, neatness, protection, verification, and communication.
Outdoor unit quality cues
- Level, stable support: The condenser sits on a secure pad, stand, or approved platform rather than unstable soil or a tilted surface.
- Required clearance: The unit has breathing room for airflow and service access based on manufacturer instructions.
- Drainage awareness: The location avoids obvious standing water concerns and allows reasonable access after heavy rain.
- Coastal awareness: In salt-air areas, placement should consider corrosion exposure where options exist.
- Storm exposure awareness: In South Florida, installers should be mindful of wind, flooding, and support requirements without improvising beyond code or manufacturer guidance.
Indoor and connection quality cues
- Neat equipment placement: Indoor components are accessible for service and not squeezed into a location that makes future work impractical.
- Secure duct transitions: Connections look supported, aligned, and intentionally sealed rather than patched together.
- Protected refrigerant line routing: Lines are routed cleanly and protected from unnecessary damage risks.
- Sealed penetrations: Wall or building openings are closed appropriately to help limit air, moisture, and pest entry.
- Organized controls and wiring: Wiring and controls appear orderly, labeled where useful, and consistent with equipment instructions.
Performance verification cues
- Airflow verification: The installer checks that air is moving properly through the system rather than simply turning it on and leaving.
- Thermostat testing: Cooling operation responds correctly from the thermostat or control.
- Condensate review: The installer confirms moisture has a planned path out of the system.
- Startup documentation: The contractor records relevant startup readings and equipment information.
- Clear explanation: You receive a practical explanation of normal operation, filter access, and who to call with concerns.
Manufacturer installation manuals typically define clearances, wiring requirements, line-set limits, condensate guidance, and startup steps. Quality installers treat those instructions as required field guidance, not optional suggestions.
Florida Air Conditioner Setup Checklist: Before, During, and After Installation
Use this checklist to stay organized before, during, and after air conditioner setup. It is especially useful for Florida homeowners, where heat, humidity, permitting expectations, coastal exposure, and storm-conscious placement can affect the installation conversation.
Before installation day
- Clear access to indoor equipment areas, outdoor condenser areas, attic entries, closets, garages, gates, and side yards.
- Secure pets before the crew arrives.
- Confirm parking, entry instructions, elevator access, or community gate details if applicable.
- Ask for the estimated schedule and whether cooling will be unavailable for part or all of the day.
- Discuss expected electrical shutoff time.
- Ask how permits or inspections are handled for your installation scope.
- Confirm thermostat location and any control preferences before work begins.
During installation
- Look for floor protection, organized staging, and respectful handling of indoor work areas.
- Confirm the outdoor unit is placed on a stable support with visible service and airflow clearance.
- Notice whether wall penetrations and line-set paths are handled neatly.
- Ask questions if you do not understand a placement decision, especially around access, drainage, or storm exposure.
- Expect clear communication if the crew finds unexpected duct, electrical, structural, or access issues.
- In humid areas, ask for a plain-language explanation of condensate routing and safety considerations.
After commissioning
- Confirm the thermostat responds and the cooling cycle starts properly.
- Ask whether indoor airflow was verified.
- Check that the outdoor unit has clearance and the surrounding area is clean.
- Look for sealed penetrations where lines or wiring enter the home.
- Ask where the filter is located and how access panels should be handled.
- Review warranty documents, model numbers, startup notes, and maintenance expectations.
- Confirm who schedules or manages any required inspection if one applies.
A professional Florida HVAC installation should feel organized, documented, and easy to understand. You should not be expected to manage technical work, but you should be given enough information to know the system was installed with care.
Questions to Ask Before Choosing Professional AC Installation
A good installation techniques guide should do more than explain the work. It should help you evaluate the contractor who will be doing it. The best AC installers are able to describe their process clearly, explain what will happen inside and outside your home, and provide documentation that shows the system was set up according to manufacturer requirements.
Before scheduling professional AC installation, use the questions below to compare companies. You are not trying to become the installer. You are looking for signs that the contractor follows an organized, code-conscious, and homeowner-friendly process.
Questions About the Pre-Installation Walkthrough
The pre-install walkthrough is where a contractor confirms the details that affect comfort, safety, access, and equipment performance. This step is especially important for central air installation, because the crew may need to work around ductwork, electrical service, refrigerant lines, condensate drainage, the outdoor pad, attic access, closet space, or a garage air handler location.
- What will you inspect before installation day? Look for an answer that includes the existing equipment, duct connections, electrical requirements, refrigerant line routing, condensate drain path, equipment location, and thermostat wiring.
- Will you confirm the equipment is properly matched for my home? The contractor should be able to explain how the outdoor unit, indoor coil or air handler, thermostat, and any accessories work together as a system.
- How will you evaluate the ductwork? Even high-efficiency equipment can underperform if ducts are damaged, undersized, disconnected, or poorly sealed.
- Where will the indoor and outdoor equipment be placed? Ask about service clearance, airflow clearance, drainage, noise, sunlight, landscaping, and access for future maintenance.
- Are there any site conditions that could change the scope? Examples include corroded disconnect boxes, damaged line sets, clogged drain lines, unstable condenser pads, insufficient return air, or limited attic access.
In Florida homes, the walkthrough should also account for humidity control, condensate drainage, outdoor exposure, and coastal corrosion risks where applicable. In hurricane-prone areas, ask how the outdoor unit will be set, secured, and positioned according to local expectations and manufacturer instructions.
Questions About Protecting Your Home During Installation
AC replacement can involve moving heavy equipment, opening panels, accessing attic or closet spaces, brazing refrigerant lines, and removing old components. A careful contractor should be able to explain how the crew will keep the work area safe and clean.
- How will your crew protect flooring, walls, and work areas? Ask whether they use drop cloths, shoe covers, floor runners, and careful equipment removal procedures.
- What areas of my home will need access? Common access points include the thermostat, electrical panel, attic, garage, air handler closet, outdoor condenser area, and drain termination point.
- Will furniture or stored items need to be moved? This is common around indoor air handlers, attic ladders, outdoor equipment, and electrical panels.
- How will the old equipment be removed? The contractor should describe safe recovery, disconnection, removal, and disposal practices.
- Who is responsible for cleanup? A professional crew should leave the installation areas neat and remove old equipment, packaging, and job-related debris.
Clear answers here help prevent surprises. If the installer cannot explain how the home will be protected, that may signal a rushed or poorly managed air conditioner setup.
Questions About Timeline, Access, and Comfort Interruptions
Most homeowners want to know how long they will be without cooling. The answer depends on the system type, equipment location, duct or drain repairs, electrical work, and whether inspections are required. A reputable installer should give you a realistic timeline instead of a vague promise.
- What is the expected installation timeline? Ask whether the work is expected to take one day or require additional time for duct, electrical, drainage, or inspection steps.
- When will cooling be interrupted? The contractor should explain when the old system will be shut down and when the new system is expected to be operational.
- Will power need to be turned off? Ask what circuits may be affected and for how long.
- Will anyone need to be home during the work? Many installations require homeowner access for walkthroughs, thermostat setup, approvals, or final handoff.
- What could delay completion? Common delays include hidden electrical issues, damaged ducts, blocked drains, equipment access problems, or inspection scheduling.
For South Florida homeowners, timing can matter because heat and humidity build quickly indoors. Ask whether the company has a plan if installation runs longer than expected, especially for households with young children, older adults, pets, or health concerns.
Questions About Permits, Codes, and Manufacturer Instructions
One of the clearest signs of a professional installer is how they handle code requirements and documentation. AC installation is not just a mechanical swap. It can involve electrical connections, refrigerant handling, condensate drainage, equipment anchoring, and safety clearances.
- Who handles permits where required? Ask whether the contractor pulls the permit, coordinates any required inspection, and explains what the homeowner should expect.
- Will the installation follow manufacturer instructions? The answer should be yes. Manufacturer installation instructions are a quality-control baseline for equipment placement, refrigerant piping, wiring, drainage, airflow, and start-up procedures.
- What code-related items will you verify? Depending on the job, this may include electrical disconnects, breaker sizing, drain safety devices, working clearances, outdoor unit placement, and equipment anchoring.
- Will refrigerant work be performed by qualified personnel? Refrigerant handling requires proper training and compliance with applicable requirements.
- What happens if something does not pass inspection? The contractor should explain who resolves corrections and how quickly they are handled.
A vague answer such as “we always do it this way” is not the same as a documented process. Professional hvac installation techniques should align with manufacturer start-up requirements and local code expectations, not shortcuts.
Questions About Start-Up, Testing, and Commissioning
Installation is not complete when the equipment turns on. A proper start-up verifies that the system is operating as intended. This is where a contractor checks the details that affect comfort, efficiency, humidity control, and long-term reliability.
- What start-up checks will you perform? Ask about thermostat operation, system cycling, refrigerant charge verification, airflow, temperature split, condensate drainage, electrical readings, and safety controls.
- Will you provide start-up or commissioning documentation? Many manufacturers include installation and start-up checklists. Homeowners can ask for a copy or summary of the results.
- How will you verify airflow? The contractor should check more than whether air comes out of the vents. They should consider return air, supply air, static pressure when appropriate, duct condition, and filter setup.
- How will you confirm the condensate drain works? In humid climates, drain performance is essential. Ask whether the crew will test drainage and safety switches.
- Will you check thermostat staging and controls? This matters for variable-speed systems, heat pumps, smart thermostats, dehumidification settings, and zoning controls.
If a contractor does not mention start-up documentation or commissioning, ask directly. A strong installer will understand why you care. The goal is not paperwork for its own sake. The goal is proof that the system was tested after installation, not merely connected.
Questions About the Homeowner Handoff
The final handoff should make you comfortable operating the new system. A professional installer should not leave until you know how to use the thermostat, what normal operation sounds like, where the filter is located, and what to watch for during the first few days.
- Will you show me how to use the thermostat or controls? Ask for a basic demonstration of cooling mode, heating mode if applicable, fan settings, schedules, humidity settings, and app setup if included.
- Where is the air filter, and what size does it use? Confirm the filter size, replacement schedule, and whether the system uses a standard filter, media cabinet, or multiple returns.
- What should I check after the crew leaves? Ask about normal cycle times, drain line discharge, thermostat response, and any early warning signs.
- What paperwork will I receive? This may include warranty information, equipment model and serial numbers, permit or inspection details, start-up documentation, and maintenance recommendations.
- Who do I call if something seems wrong? Make sure you have the service contact, warranty process, and after-hours procedure if available.
After installation, homeowners should monitor the system during the first few days. Check that the home cools evenly, the thermostat responds correctly, the outdoor unit has clear airflow, the indoor unit is not leaking water, and unusual noises or odors do not persist. If something seems off, contact the installer promptly rather than waiting for the issue to become larger.
FAQ
What is an HVAC installation techniques guide?
An HVAC installation techniques guide explains the methods, checks, and best practices used to install heating and cooling equipment safely and correctly. For homeowners, it is most useful as a roadmap for understanding what a professional installer should inspect, install, test, and document during an AC or central air installation.
What are the main steps in professional AC installation?
The main steps usually include a pre-install assessment, equipment removal, site preparation, indoor and outdoor unit placement, refrigerant line and electrical connections, condensate drain setup, thermostat or control setup, system start-up, performance testing, cleanup, and homeowner handoff. The exact process depends on the system type and the condition of the existing home infrastructure.
What are the four types of installation in an HVAC context?
In an HVAC context, homeowners may hear installation discussed in four broad categories: new system installation, replacement installation, retrofit installation, and add-on or accessory installation. A new installation is typically part of new construction or a home without existing central equipment. A replacement swaps old equipment for new. A retrofit adapts a system to an existing home layout. Add-on installation may include thermostats, zoning, indoor air quality products, or dehumidification equipment.
What are the three types of AC installation homeowners may hear about?
The three common AC installation types are central air conditioning installation, ductless mini-split installation, and packaged unit installation. Central air uses an indoor coil or air handler, outdoor condenser, ductwork, and a thermostat. Ductless systems use indoor wall, ceiling, or floor units connected to an outdoor unit. Packaged systems combine major components in one outdoor cabinet and are often connected to ductwork.
Can homeowners install central air conditioning themselves?
Central air installation is not a practical DIY project for most homeowners. It can involve electrical work, refrigerant handling, duct connections, condensate drainage, equipment sizing, manufacturer start-up procedures, and local code requirements. Mistakes can lead to poor comfort, water damage, safety risks, voided warranties, or early equipment failure. Homeowners can prepare the space and ask informed questions, but the installation itself should be handled by qualified professionals.
How do you know if an AC installation was done correctly?
A correct AC installation should cool the home consistently, drain condensate properly, run without unusual noise or vibration, respond correctly to thermostat commands, and have clear airflow at the supply and return locations. The installer should also provide equipment information, warranty details, and start-up or commissioning documentation when available. If rooms are uneven, the system short cycles, water appears near the indoor unit, breakers trip, or humidity remains high, call the installer for follow-up.


Leave a reply